Garbage Collector
Tales from an old nibble
Building Zebra's EMDK project using SDK Platform 23
2019 Update #
This post is now obsolete. Please refer to Zebra’s EMDK documentation on best practices to use the EMDK.
Note: EMDK 4.0 is now documenting this method to add com.symbol.emdk.jar as a dependency #
There’s a recurring question coming to me and to Launchpad’s forums lately:
How can I compile my Android app, using Zebra’s EMDK, if I need the latest support library?
Some background #
With the Android tools moving super-fast (Android studio v1.0 launched at the beginning of 2015, the latest stable release is v1.4.1, we already have v1.5RC and v2.0 has been announced…) keeping up to this pace is not easy for our EMDK team!
We discovered some integration issues when Android Studio v1.3 was released and we presented a workaround to use the EMDK as the building SDK. Limiting the project to API level 16 or 19. This should be good, right?
A downside of this approach surfaced when Google updated the templates for new projects, now based on the Android Support Library. I really like the approach to base new projects on the support library; the problem is that it does require to build the project with API level 21+.
Here we can have a problem
Using Zebra’s EMDK #
So, talking just about Android Studio, that is the current up-to-date Android IDE, we currently document two ways to use the EMDK:
- The official one, selecting the EMDK in the “Compile SDK” drop-down when creating the project
- The Android Studio v1.3+ workaround way that suggest to manually set the EMDK as the “Compile SDK”.
Both methods fails to compile a project using the latest Android Support Library.
A little gradle magic #
Here’s a third, UNOFFICIAL, way to include the EMDK in an Android project and use the latest available SDK to build the project.
Copy the lib file in your project #
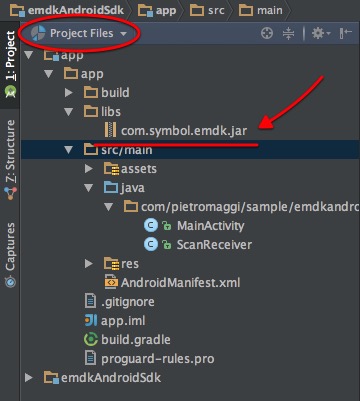
First of all, create in your Android project a lib folder and copy into it the com.symbol.emdk.jar library that you got installing the EMDK on your PC/Mac:
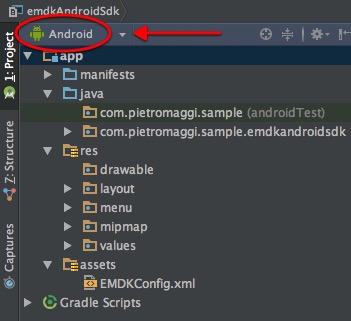
This is probably easier to say than to do, because the default Android Studio project view doesn’t show these files.

The easiest way, at least for me, is to copy the file from the setup position to a newly created libs folder in my project from Windows’ File Explorer or OSX’s Finder and then check that everything is OK switching the Android Studio project view from “Android” to “Project Files”:

Modify the build.gradle file #
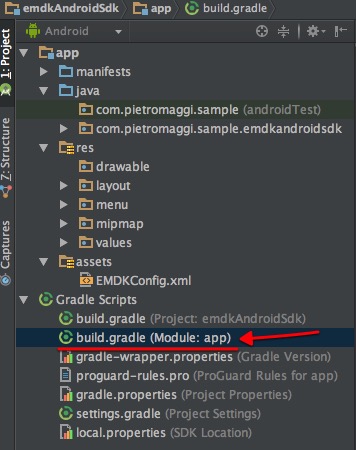
OK, once the file is included in our project (and this means that you can check in this file in your SCM and checkout on a new PC and rebuilt it without the need to Zebra EMDK installed) we can explain to Android Studio how to use it. To do this we need to modify the build.gradle file included in the app folder. If you’ve switched back to the “Android Project view”, this is the Module: App, gradle file. As shown below:

In this file you need to setup the dependencies so that the build process uses this lib as a reference without including it into the final APK (otherwise the application will exit with and exception when launched).
   dependencies {
       compile fileTree(dir: 'libs', include: ['*.jar'], exclude: ['com.symbol.emdk.jar'])
       compile 'com.android.support:appcompat-v7:23.0.1'
       provided fileTree(dir: 'libs', include: ['com.symbol.emdk.jar'])
   }
With this changes you can build your project using the latest available SDK, just remember that you’re targeting Zebra devices with API level 16 or 19, so, setup your minimum SDK accordingly.
You can find a demo app built with this technique on my github account.
Happy coding
~Pietro