Garbage Collector
Tales from an old nibble
Enterprise Browser and DataWedge on Android - friends at the end
During Enterprise Browser hands-on lab, I got some enquiry about using other MobilityDNA utilities together with EB; in particular how to integrate SwipeAssist and Simulscan. These utilities can be integrated, with some heavy lifting, and accepting some constraints.
Some background #
The current scanner framework implementation on our Android devices make available a single scanner object that provides full Scanner control. As always …“with great power comes great responsibility”: an application using the scanner object from the Barcode API, is required to release it when it’s going in the background (usually you do this handling in the onPause() callback in your native application).
Enteprise Browser implements its own Barcode API on top of the native EMDK Barcode API, however, due to the nature of the web application running inside EB, it does not release the scanner object. This locks the use of the scanner out for any other application that is in foreground while EB is in the background; including DataWedge.
Because utilities like SwipeAssist, are linked to DataWedge:
NO DataWedge --> NO SwipeAssist
The standard experience #
When you run EB v1.5 on our Android devices, DataWedge is completely disabled, even when EB is in the background… This is good if you plan to work completely inside an EB application, however, sometimes, you want to have some sort of integration.
Some of the requests #
During these last weeks I got some request from Enterprise Browser users:
- Being able to use DataWedge to scan barcodes inside EB
- Being able to use SwipeAssist
- Being able to use SimulScan multibarcode scanning from EB
Let’s start from the first request!
Making EB and DW coexist #
We’ve documented the steps to enable DataWedge in EB on the documentation website for EB v1.5. So, go there, and download the new DW profiles documented there!
Once you’ve imported the two profile from the previous section, DataWedge will display a new profile with the name “EnterpriseBrowser”:
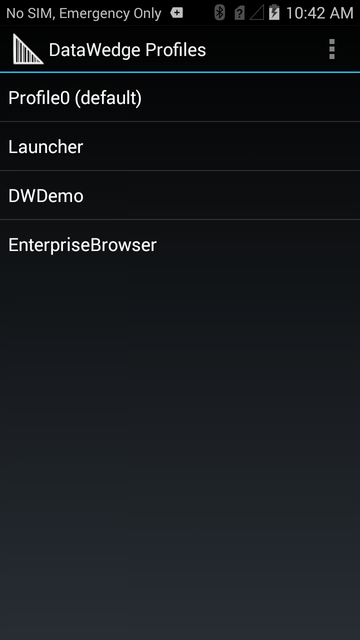
We’re now ready to play with Enteprise Browser configuration to see if this works.
Update Config.xml and test a sample webpage #
To follow this steps you need to have launched EB at least once, so that it creates its default configuration files under /<sdcard/internal>/Android/data/com.symbol.enterprisebrowser.
The you can proceeds copying it to your PC to apply some changes.
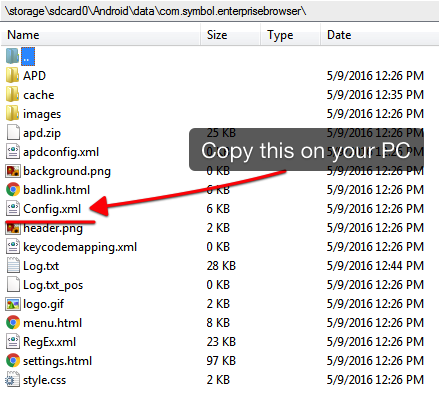
You need to apply three changes to follow along the rest of this blog:
- Enable the internal EB webserver and specify the folder how we plan to have the local files (as an example on the internal sdcard of the TC55 KK):
    <WebServer>
      <Enabled VALUE="1"/>
      <Port VALUE="8082"/>
      <WebFolder VALUE="/storage/sdcard0/www/"/>
      <Public VALUE="0"/>
    </WebServer>
- Modify the startpage value:
    <General>
      <Name value="Menu"/>
      <StartPage value="http://127.0.0.1:8082/index.html" name="Lab"/>
      <UseRegularExpressions value="0"/>
    </General>
- Enable the use of DataWedge for barcode scanning inside Enteprise Browser
<usedwforscanning value="1"/>
Now we can try with a simple HTML page to see if it works:
    <html>
      <head>
      </head>
      <body>
        <input type="number" id="Barcode" />
      </body>
    </html>
To test this page on the device, we’ve to copy it into the root folder of the HTTP server we configured in our Config.xml, if you used the settings reported here, you can copy this file to /storage/sdcard0/www/ giving it the name: index.html.
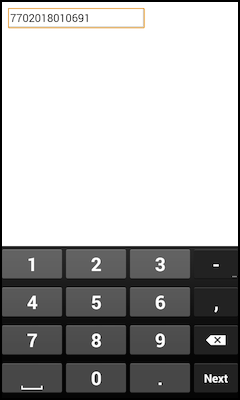
Opening Enterprise Browser we see that we can:
- touch the edit field (and have the numeric keyboard displayed)
- scan a barcode with the hardware trigger
- have the barcode inserted in the edit field by DataWedge
Automate this step a bit #
Next thing that would be nice to have is to avoid to touch the display to be able to scan, in this case a little JavaScript can help. With this version of the sample we can immediately scan a barcode getting the data in the input field. Note that no Keyboard is shown as I’ve not touched the input field here:
<html>
  <head>
    <script>
      function domReadyEvent() {
        setTimeout(function() {
          var fld = document.getElementById('Barcode');
          fld.focus();
        }, 1000);
      }

      window.addEventListener('DOMContentLoaded', domReadyEvent);
    </script>
  </head>
  <body>
    <input type="number" id="Barcode" />
  </body>
</html>

EB and SwipeAssist #
What if we want to use SwipeAssist inside this demo application?
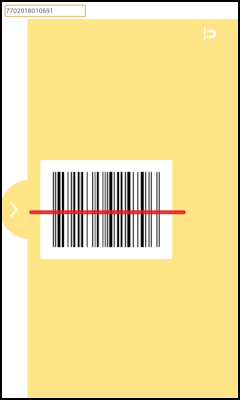
It’s simply a matter of enabling the Show option in the Data Capture Panel section of our DataWedge profile EB_Simulscan:
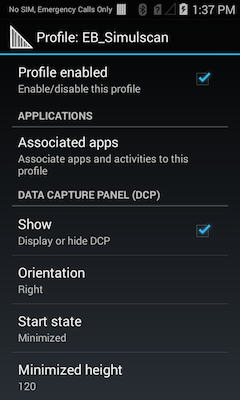
And the result in EB is:
EB and SimulScan #
Next, and final, goal is to use SimulScan to read two barcodes and have the data filled in two different input field, with the minimum JavaScript necessary to select the first input field:
<html>
  <head>
    <script>
      function domReadyEvent() {
        setTimeout(function() {
          var fld = document.getElementById('Barcode');
          fld.focus();
        }, 1000);
      }

      window.addEventListener('DOMContentLoaded', domReadyEvent);
    </script>
  </head>
  <body>
    <input type="number" id="Barcode" /> <br>
    <input type="number" id="Barcode2" />
  </body>
</html>
It now time to play a bit with the DataWedge profile configuration, starting disabling the Data Capture Panel, and Enabling Simulscan, selecting the Default - Barcode 2 template:
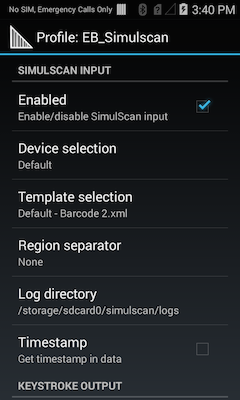
If we now try this on our page, we see that the two barcodes are send as a single string, we need to split the two barcodes. The Region Separator seems like a good candidate, however, even sending a tab as a separator is not going to solve this issue.
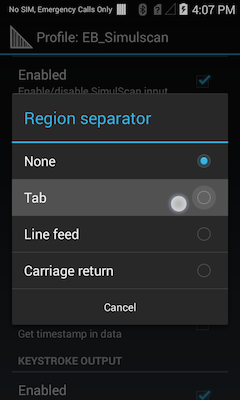
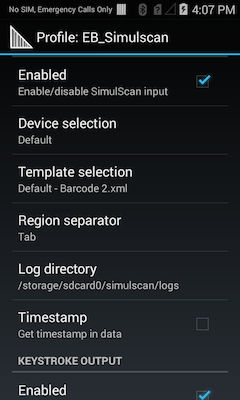
The reason is that the web pages takes to much time to switch the focus to the second input field and so you end up loosing the data of the second barcodes:

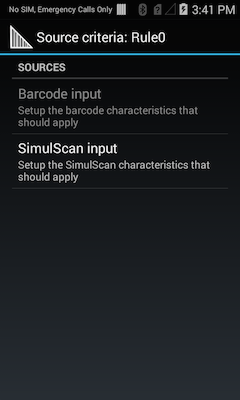
We can try a different solution using DataWedge Advanced Data Formatting so, we revert back to not have any region separator for Simulscan and we add and Advanced Data formatting rule:
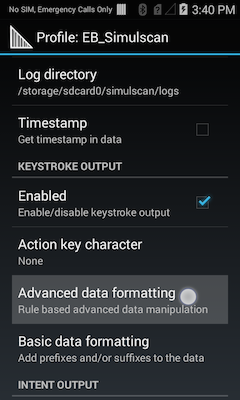
Enable it!
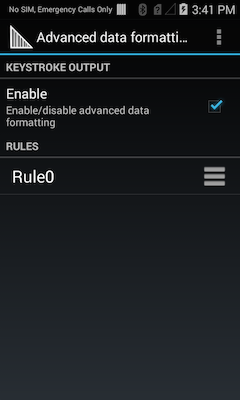
and specify when it needs to be activated. I this case for me it’s always in my scenario
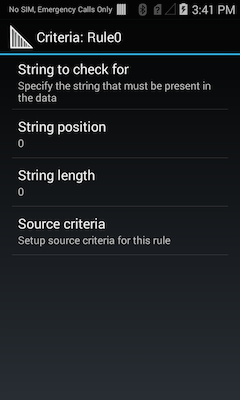
Just checking that this rule is only applied to data coming from Simulscan and not from the Barcode scanner
And now the actual rule. The basic idea is to send the first 9 chars of the data coming from Simulscan (in my case this is the first barcode), then send a tab, wait for 100ms and then send the rest of the data coming from Simulscan:
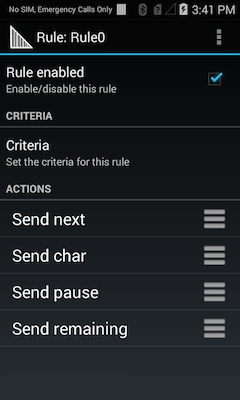
Again:
- Send the first 9 chars
- Send a tab (
0x09) - Wait 100ms
- Send the rest of the data
If we try this setup with our simple test page, the result is actually the desidered one:

Conclusion #
We reached the end of this exploration on how is possible to integrate Enterprise Browser with DataWedge. In some cases it makes sense to use a similar setup to enable existing webpages without touching them. For this reason, in the samples presented here, I tried to minimize the amout of JavaScript code needed to have them working. A much better integration can be achieved starting to work on the onKeyPress events or using EB Intent API. Personally I think that if you want to customize your web app to have a better integration on Zebra devices, using EB’s Barcode API is a better choice that following the DataWedge route.
Talking about Simulscan, it could be interesting evaluate how to integrate DataWedge SimulScan Intent output with EB… Till there’s no integrated SimulScan API in Enterprise Browser.
Let me know if you have any comment on these topics.